Showing posts with label Flowers. Show all posts

Wednesday, May 14, 2025

Crafty Gals Corner- Challenge #267 Fill in the Blank: Fancy _________


Hello Crafty Friends,

Can you believe it is May already?  The days are flying by.  I am loving the cooler weather here in So Cal, and hope they last as long as they can.  I do not like summer.

The challenge this month is Fill in the Blank: Fancy ________.  I chose to do a fancy FOLD for the challenge.  I used the Poppy Fairy image from Moondrea Designs for my card. 


Here is the card I created:


Here is a look inside when the card is folded into an easel card.


I colored the image with my Copic Markers:

Skin: E11, E21, E51, E50

Flowers: YR18, YR16, YR12, E79, E77

Hair: E79, E29, E25, E21

Leaves: G99, G94, YG03

Dress: BG49, BG15, BG45

Wings: BG45, BG13, BG11

Lips: RV23, RV91

I finished the card by matting the image with cardstock and adding the foiled  sentiment from Taylored Expressions to the inside,  I wanted to keep it simple as to not draw away from the image itself.

Thank you for stopping by and looking,  Please leave me a comment and then create your own "Fancy _____" and share it with us at Crafty Gals Corner.

Wednesday, May 1, 2024

Mix it Up Challenge Blog- Inlaid Die Cut Challenge


Hello Crafty Friends,

We have a new challenge at Mix it Up Challenge blog and when I heard the theme, I knew exactly what die I wanted to use.  The challenge this month is Inlaid Die Cut either raised of flat.  I pulled out this old die set from Fun Stampers Journey and went to work.


Yes, this card too some time, but the results are stunning and the recipient will appreciate it. 

Here is how I created this card.  I first cut the card front pieces in grey, blue, green and pink. I added sticker paper to each one. I then die cut the card front piece 4 times.  Then the fun began.

I took the grey piece and attached it to a piece of copier paper. I then took the pieces from the other card fronts and laid them into where the color should be.  Each individual piece.  I love the way it turned out.

I finished the card by adding a label die cut with my sentiment on it with a strip of white cardstock underneath to the card front.  

Thank you for stopping by. Please join the challenge st Mix it Up Challenge Blog and leave me a comment as well.

Love to Craft Challenge Blog-Anything Goes


Hello Crafty Friends,

New month and new challenges coming this week. Love to Craft Challenge Blog is up and I am sharing a new to me technique.  I am not even sure what it is called, but I new it looked very springy,


Here is how I created this card.  I first folded the card base of 4 1/4 x 11 in half.  I then trimmed off 6 half inch pieces off the bottom.  

Using washi tape, i aligned four of the strips to make the "card base" again, leaving spaces in between.  I then glued the remaining pieces to be the posts of the fence to either side, leaving small portion hanging off the bottom, which I cut off.

I stamped and colored the images from Taylored Expressions.  I then stamped the sentiment from Pink and Main and matted it with purple cardstock. 

I love the way it came out and hope you do too.

Please join the challenge at Love to Craft Challenge blog and leave me a comment also.


Wednesday, September 13, 2023

Crafty Gals Corner Challenge #247 Signs of Fall


Hello Crafty Friends,

Fall is coming.  Here in Southern California the weather is not fell, but the sights are there.  I look forward to cooler days and cooler nights.

Some of the sights I have been seeing are just those things on the card I designed using a Beccy's Place digital stamp. 


I colored the image "Autumn Blessings" using my Copic Markers.


Pumpkins YR27, YR68, YR15, E44, E43

Sunflowers: E47, E44, E43, YR04, Y19, YG67, YG17

Milk Can: C7, C5, C3, C1

Stool: E37, E33, E31


I used strips of Echo Park, Fall Breeze paper to create the background.  I then stamped the sentiment from Lawn Fawn's Scripty Autumn Sentiment set.  

Now it is your turn.  Leave me a message or comment on my card. Then go and create a "fall" card and share it with us at Crafty Gals Corner.  


Wednesday, May 10, 2023

Crafty Gals Corner- Challenge #243- Flowers for Mom


Hello Crafty Friends,

New challenge at Crafty Gals Corner with Mom's in mind. To be honest, my mom does not like real flowers, but she does like the one's that I color. So, this challenge was fun to create. 

The image I received to play with was from Fred, She Said Digital Designs and titled "Open Poppy".

I love the poppy and being from California, we see lots of poppies because it is our state flower.  I hope I did this poppy justice.

I colored the poppies with my Copic Markers:

Flower: YR 09, YR16, Y17

Stems: G99, G85.

I created the card using a grass die and layers of paper. I stamped the sentiment with green ink and popped it up with foam squares. I added some yellow ink to the edges of the yellow layer of cardstock.

To finish the card, I added some orange epoxy stickers to the card.

Now it is your turn.  Leave me a comment and then share your "flowers for mom" on the Crafty Gals Challenge Blog.


Thursday, September 1, 2022

Love to Craft Challenge- Anything Goes


Hello Crafty Friends,

Today at Love to Craft Challenge Blog we have a new month. I don't know about you, but I am ready for summer to be over, but before we bid it a farewell, I want to share a card I created for a Tropical theme swap I was involved in recently.


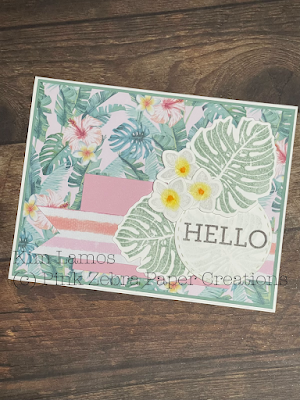
I created the base of the card using pattern paper from Recollections.  I then stamped the images from Fun Stampers Journey (retired) with green ink for the leaves and a light grey for the flowers.  I die cut them out with the matching die set.

After the flowers were cut out, I added some yellow and orange ink to the middle of the flowers to match the ones in the pattern paper.  The sentiment from Doodlebug Designs was stamped with black ink.

Thank you for stopping by,  Please leave me a comment. Then join the challenge at Love to Craft Challenge blog where we always have an anything goes theme.


Wednesday, June 8, 2022

Crafty Gals Corner- Challenge #232 Anything Goes


Hello Crafty Friends,

Today we have a new challenge of Anything Goes at Crafty Gals Corner.  That means you can create a project of any theme and join the challenge here

For this challenge I received this "Tulips" digital stamp from Twinkle Lane Designs.

Here is the beautiful card I created with this lovely stamp.


The first thing I did was color the image with my Copics.

Stem and Leave: YG67, YG17, YG25

Blooms: R89, R85, R83

I tried something a little different for me with this image.  I left the tips of the petals white. I usually have to color every bit of an image, but I felt that the tulips may not necessarily have color on the whole petal.

I then created my base using some cardstock from y stash.  The "pattern" paper is actually some washi tape I put around a piece of cardstock.

I then added a piece of green that I die cut from Lawn Fawn's Grass die to the bottom of the image.

Lastly, I die cut and adhered this mini bow from Fun Stampers Journey to the bottom of the card front.

To finish the card, I added the sentiment that came with the tulips at the top.

Thank you for stopping by.  Please leave me a comment. Then create your own project and share it with us at Crafty Gals Corner.

Tuesday, March 8, 2022

Crafty Gals Corner- Challenge # 229- Add a Flower!


Hello Crafty Friends,

Where do the days go?  I have been so busy, but it was a nice change of pace to get to color this beautiful flower digit stamp from Beccy's Place "Bees and Blooms".


Here is the card I created as the final product.


I colored this flower image with my Copics:

Stem and Leaves: G99, G94, G24

Petals: Y19, Y15, Y11

Centers: E29, E25, E23

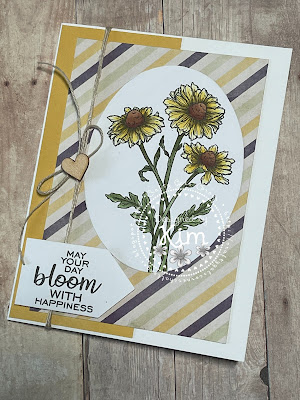
The card base was created using white cardstock, a block of Prima St. Topez by Frank Garcia and a strip of Echo Park Made from Scratch paper set.

To finish the card, I added some natural twine and added a wood heart I had from my stash.

Thank you for stopping by.  Please leave me a comment.  Then join the challenge at Crafty Gals Corner.

Monday, January 3, 2022

Bitten By the Bug 2- Collaboration Challenge


Hello Crafty Friends,

We have a new challenge at Bitten by the Bug 2 and we collaborated with Double Trouble.  It is all about layers for this challenge.  

For Cuddle Up Day, let's think cozy and warm...  Layer Up!  You MUST use at least one die, punch, or machine cut and include at least two or more layers on your project. Bring on your card layering techniques and Layer Up.

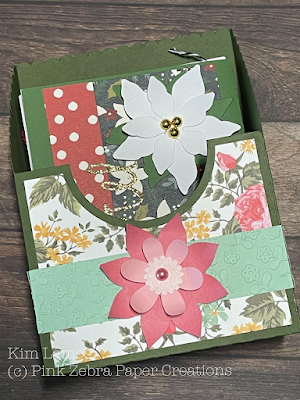
I created this free file form Dreaming Tree, for an upcoming class and thought this was a great "layered up" project.  

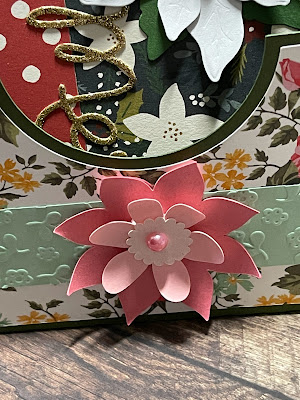
The layers are are in the flower on the front of the card holder.  It is a total of 7 different layers.  It is such a fun design too.

Here is a close up of the layers.

Thank you for stopping by.   Please leave me a comment.  Then create a project with layers and share it with us here at Bitten By the Bug 2. 


Wednesday, June 9, 2021

Crafty Gals Corner- For the Boys


Hello Crafty Friends,

For the Boys is the theme of this month's challenge at Crafty Gals Corner.  I was drawn to this beautiful digital stamp by Pattie's Creation Digital Images and couldn't want to color it up. 

 I colored the image with my Copics.


Flowers: Y19, Y15, Y11

Leaves: YG13, YG11

I then cut out the one side of the image and mounted the image on a piece of Authentique Classique: Elegant pattern paper and then matted that on cardstock from my stash.

I die cut the sentiment from a die in my stash (not sure where I got it) out of Black cardstock.  

To finish the card, I added some black enamel dots to the corners.

Thank you for stopping by and leave me a comment.  Then come join the challenge with us at Crafty Gals Corner.  


Monday, May 24, 2021

Bitten by The Bug 2- May Flowers


Hello Crafty Friends,

Today we start a new challenge with a "May Flowers" theme over at Bitten by the Bug 2.  I love Gerber daisies, so when I saw this cut file from Dreaming Tree, I knew I had to make it for this challenge.


 I cut the file with some cardstock from my stash and wrapped the elements around the tea light.  

 To finish it off, I added the leaves strip to the bottom.  It was really quite simple and is a free svg file from Dreaming Tree.  I could see these at a tea party or wedding as centerpieces as well. 

So, now it is time for you to create something with flowers using your Cricut and sharing it with us at Bitten by the Bug 2.

Thanks for stopping by.  Please leave me a comment.


Wednesday, May 12, 2021

Crafty Gals Corner Challenge- For the Ladies


 Hello Crafty Friends,

 I hope your May is going great so far.  We have a new challenge at Crafty Gals Corner and it is all about the ladies.  Our sponsor this month is Moonflower digistamps. 

I was lucky enough to get to play with this darling stamp called "Lily the White Queen".


I tried a new color combo on her dress.

Dress and Crown: R59, R56, RV34, R81

Skin: Ell, E21, E51, E50

Hair: E99, YR24, YR23

Flowers: BV34, BV31

Leaves: YG13, YG11

The pattern paper is from Frank Garcia's Wild and Free collection.  The sentiment is from Queen and Company.  When the card was all complete, I used Wink of Stella on her ruffles and crown.

Here is a closer look at her:


Now it is your turn.  Create something "For the Ladies" and share it with us at Crafty Gals Corner.

Thanks for stopping by.  Please leave a comment. 


Saturday, May 1, 2021

Love to Craft Challenge Blog


Hello Crafty Friends,

It's a new month that means we have a new challenge at Love to Craft Challenge Blog.  This month I decided to create a easel card.  


I love easel cards because the card can be displayed for all to see.

This card was made with some pattern paper I found in my stash, I don't even know where I got it.  I just loved the flowers and garden theme.

When you open the card, it stands like this.


 A little trick I did was I used a border of a pattern paper and placed across the bottom of the card inside and this can be used to hold the easel part up.

Thank you for stopping by.  Please leave me a comment.  Then create your own project and share it with us at Love to Craft Challenge Blog.


Friday, March 26, 2021

Stampin Friends Blog Hop- Monochromatic March


Welcome to the Stampin Friends Blog Hop.  This month and the theme is Birthday Celebration. If you are following along the hop, you should have arrived from Maureen Rauchfuss' blog.  Make sure to read through my blog, comment below and then continue to Jo Blackman's blog.

If you get lost along the way, you can find a list of Blog Hoppers at the end of each blog.

Here are the projects I created for our Monochromatic March theme.   

If you know me, you know I love pink, so of course I would pick pink for my Monochromatic color.


I used 2 different pieces of pink cardstock from my stash to create the card base.  I then stamped the flower from Cottage Bouquet stamp set from Fun Stampers Journey (retired) with pink ink.  I then stamped one whole flower on another piece of pick cardstock.

I added some pink satin ribbon to the left side of the card and to add interest I tied some pink bakers twine around sections of the ribbon.


I finished the card by stamping the sentiment from the same stamp set and added some pink pearls to the card front.

For my project, I wanted to create a small little box to match the card.  So I pulled out my small milk carton die.

I can't wait to fill this little box and give it to a friend.  I used the same supplies as above, but used grey ink on white cardstock for the flower I placed on the top.  I attached the flower to the box by wrapping some pink bakers twine around the top of the box and tying the flower in.

Here are the card and box together.  


Aren't they cute together?  I hope it brings a smile to my friend who receives it.

Thanks for stopping by.  Please leave me a comment and then check out all the other incredible projects from the other ladies this month.

  1. Kirsty Pattrick (UK)
  2. Teri Pocock (UK) 
  3. Jean Beaulieu (US)
  4. Maureen Rauchfuss (US)
  5. Kim Lamos (US)
  6. Jo Blackman (UK)
  7. Heidi Collins (US)
  8. Steph Jandrow (US)
  9. Melissa Thomas (US)
  10. Katja Ettig (GER)
  11. Tiziana Milano (US)


Wednesday, November 11, 2020

Crafty Gals Corner- Thankful and Thank You


Hello Crafty Friends,

Today we have a new challenge at Crafty Gals Corner: Thank yous and Thankful.   I had fun playing with this image from Fred, She Said Digital Designs.

I colored the image using my Copics.

Pumpkins: YR27, YR68, YR15

Leaves: G99, G94, YG03

Sunflowers: Y38, Y19, Y15

Stems: E27, E25

I then used some pattern paper from Frank Garcia, Amber Moon collection and cardstock from Fun Stampers Journey for the card base.  I used the die set from Queen and Company for the word Blessed.  I die cut the back ground with cardstock from Fun Stampers Journey and the word itself from glitter fun foam.  I love the dimension it adds.

To finish the card, I added a piece of Pumpkin Patch Ribbon from Fun Stampers Journey around the card and added a sweet premade bow from Fun Stampers Journey.

I hope you will create a thank you or thankful card and join the challenge at Crafty Gals Corner.

Also, thank you for stopping by.  Please leave me a comment. 


Tuesday, September 8, 2020

Summer Embellishment Swap

 Hello Crafty Friends,

Recently, in my crop group, we had an embellishment swap.  My partner loves blue and yellow and makes cards, so I made some embellishments she could use on her cards.  

Here are the embellishments I made for her.

I used pattern paper from my stash and used cardstock from Fun Stampers Journey.  

Here is a close up of each of the pieces.

I used Journey Scallops, Catalina Splash Satin Ribbon, Black Licorice and sentiment are from Fun Stampers Journey.

I used Journey Hexagons, Baby Envelope and sentiment are from Fun Stampers Journey.

Made these bows with Baby Bow die from Fun Stampers Journey.

Flower stamp, sentiment, washi tape, twine and ribbon are from Fun Stampers Journey.

I had fun creating these and she loved them.

Thank you for stopping by.  Please leave me a comment.