Thursday, December 24, 2015

Vintage Christmas Tree

I love Christmas Trees with snow on them.  So to wish you a Very Merry Christmas, I have a vintage Christmas card for you today.
The card base is made from Buttercream Cardstock.  I then cut a piece of Oatmeal Cookie and Buttercream Cardstock for the next two layers.  Before I adhered these pieces to my card base, I used my scissors to distress the edges of the cardstock.
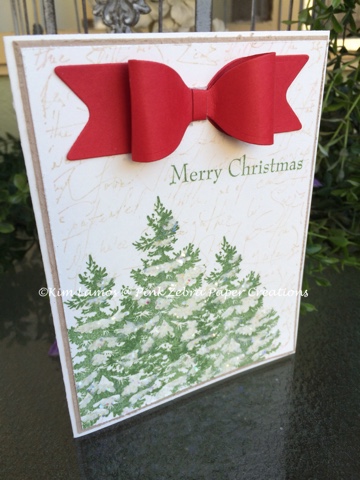
I then stamped the Script Background on the top Buttercream layer with Oatmeal Cookie ink.  I then stamped the trees from Winter Wonderland using Fresh Forest ink, three times.  I stamped the Merry Christmas from the Cheerful Trees Set in Fresh Forest Ink.
I then added the paper bow at the top, that I created using the Create a Bow Mini and Cranberry Bliss Cardstock.
To finish the card, I added Journey Sparkle Cuts using Journey Glaze to the trees.  Enjoy!

Tuesday, December 22, 2015

Christmas Cookies

One of my favorite things about Christmas are all the cookies that get baked, exchanged and consumed.  Today I have another card featuring some no calories cookies.
The card base is made from Butter Cream Cardstock.  I then took a doily and cut it in half and secured it to the card base with a strip of washi tape.  I added 2 more strips of washi tape above the first one.  I then stamped the "cookies" from the Cookie Exchange set in Fresh Forest, Cranberry Bliss and Hazelnut Blend ink on Oatmeal Cookie Cardstock.  I then fussy cut them and adhered them to the card using foam squares.
I tied a Natural Journey Twine around the card into a bow on the right side.
I stamped Merry Christmas from the Cookie Exchange Set in Cranberry Bliss Ink.
I finished the card off with some Sparkle Drops.  Enjoy!

Sunday, December 20, 2015

Scrappy Joy

Today's card is great for using up those scraps.  Actually, there is no stamping on this card either.
The card base is made from Kiwi Slice Cardstock.  I then cut a piece of Rich Coral Cardstock at 5 1/4 x 4 and the cut this piece in half at 2 and then each of those pieces cut at 3 the long way.  I then cut pieces of Winter Fresh paper slightly smaller; two at  2 1/8 x 1 7/8 and two at 1 7/8 x 3 1/8.  These pieces were then attached to the pieces of Rich Coral Cardstock and then adhered to the card.
Then, I cut a pierced circle using Journey Circles and Whip Cream Cardstock.
Then, using Fresh Forest and Candy Apple Cardstock, die cut the holly, berries and Joy from the Snapshot Frames Die.  I adhered these to my card, using foam squares to pop up the Circle.
I finished the card by using Journey Glaze on the berries and the word Joy!  Enjoy!

Friday, December 18, 2015

Cookie Gift Card Pocket

Cookies and gifts are so Christmas.  I love eating cookies and one of my favorite memories of Christmas is all the cookies my mom makes each year. 
For this card, I used the Pocket Card die  and Cranberry Bliss Cardstock to make the base of the pocket card.    I then cute just the middle section of the pocket card using Winter Fresh prints to make the layer of Santa Hats.  I die cut a circle from the Journey Circles in Whip Cream Cardstock.  I distressed the edges of this with Oatmeal Cookie Ink.
I stamped the "cookies" from the Cookie Exchange set in Cocoa Powder, Cranberry Bliss and Kiwi Slice ink on Oatmeal Cookie Cardstock and fussy cut them.
I then stamped the sentiment on the insert made from Butter Cream Cardstock, with Cocoa Powder, ink.
I used Oatmeal Cookie Satin Ribbon to tie the pocket card closed.  I then added a Natural Journey Twine Bow on top.   I used foam squares to pop up the "plate" of cookies on the card.  Enjoy!

Wednesday, December 16, 2015

Ornament Merry Christmas

Christmas without a tree is not Christmas to me.  I love putting up my tree and decorating it with ornaments that have memories behind them.  This card reminds me of this.
I took a piece of Cool Pool Cardstock slightly smaller than the card front and stamped Retro Dangles with Cool Pool Ink.  I then adhered this piece flat the the card base made of Cool Pool Cardstock.
I then stamped ornaments from Ornament Party set in Candy Apple Ink on a Whip Cream Cardstock strip of paper.  I matted this strip with another strip of Black Licorice Cardstock, slightly bigger.  I then stamped the Merry Christmas and Happy New Year from Ornament Party with Dark Roast ink at the bottom of this strip.  I popped this piece up with foam squares on the top of the card base.
To finish the card, I painted some Star buttons with Silver Silk and placed them on the top of the ornament.  I filled the ornaments with Journey Glaze and dusted them with Journey Sparkle Dust.  Enjoy!

Monday, December 14, 2015

Merry Christmas Chalkboard

I love the technique to make black paper into a chalkboard.  I also love the colors of Black, Red and Green together.
I used a piece of Kiwi Slice Cardstock for the base of the card.  I cut a piece of Black Licorice Cardstock slightly smaller for the chalkboard.  Using Whip Cream Ink and a dry baby wipe, I wrapped my index finger with the baby wipe and dipped it in the ink.  I then applied the ink in a circular motion on the edges of the paper.  You can apply as little or as much as you want.  I then stamped the "Merry Christmas" from the Cheerful Trees set in the same ink.
I stamped the Mistletoe Kiss ATS in Black Licorice on Kiwi Slice Cardstock and fussy cut it out.
I then wrapped Candy Apple Satin Ribbon and Tinsel Trim around the top of the Black Licorice Cardstock. 
I popped the Mistletoe leaves up with foam squares and then added some sparkly pom poms.  To finish the card I added some Journey Sequins- Holiday Elements to the bottom area using Journey Glaze.  Enjoy!

Saturday, December 12, 2015

December Kit of the Month

December is all about family, winter, sweaters, apple cider and gifts.  I look forward to the month of December for these reasons and more.  I love Christmas time for one.  This year, I am so in love with Fun Stampers Journey Kit of the Month.
Isn't it the cutest?!  Does it make you think of curling up with a cup of coffee, a blanket and a good book?  Or does it make you want to get coffee with a friend?  Do you want a set for yourself?  Visit my website here to get your own!  Enjoy!

Thursday, December 10, 2015

Non Traditional Christmas Colors

Today I have a card for you that has non traditional colors.
I created the base of the card using Whip Cream, Black Licorice and Cool Pool Cardstock.  I then matted a piece of the Journey Basics: Black and White on Black Licorice Cardstock.  Before attaching this down, I stamped some snowflakes from the Snow Burst set, in Cool Pool Ink.  I then adhered the matted piece to the card.
I stamped "Merry Christmas" from the Cheerful Trees in Black Licorice Ink on a piece of Pearled Basics and then wrapped a piece of Cool Pool Satin Ribbon around.  Taking a circle cut with Journey Circles out of Cool Pool Cardstock, I stamped the trees from Cheerful Trees Set in Cool Pool Ink.
To finish off the card I added the Snowflake Element, a Whip Cream Cardstock snowflake cut from the Journey Blooms Holiday Set and attached some pieces from the Journey Sequins Holiday Elements using Journey Glaze.  Enjoy!

Tuesday, December 8, 2015

Reindeer Shaker Card

Today I have a fun shaker card for you.  I love making shaker cards!  They are also so interactive for the recipient.
I created the base of the card using Whip Cream cardstock and Journey Basics: Black and White paper. 
I then created the shaker part using a piece of Whip Cream Cardstock.  I filled the shaker part with Journey Sequins: Holiday Elements.  I backed the shaker card with a piece of Black Licorice Cardstock.  I added a few bits of Confetti Sparkle Elements to the shaker and the outside.
I then stamped the dear from the Winter Wonderland set in Cocoa Powder ink on Whip Cream Cardstock and fussy cut and adhered it to the card.
To finish the card off I added the sentiment from the Cheerful Trees set to the bottom of the card using Candy Apple ink.  Enjoy!

Sunday, December 6, 2015

Blitzen Card

Blitzen is too cute.  I love him.  He makes me so happy.
The base card is made from Candy Apple Cardstock and Whip Cream Cardstock.  I then took a piece of Oatmeal Cookie Cardstock and stamped it with the Linked Dots stamp and Hazelnut Blend Ink.  I stamped Blitzen on a piece of Whip Cream Cardstock and matted it with Candy Apple cardstock.   I then die cut a Treat Label with Whip Cream cardstock and cut in half.  I stamped the Merry Christmas from the Many Wishes stamp set in Candy Apple Ink.
To finish off the card I glued the flower sequins from the Journey Sequins Holiday Elements and added a bow made with Candy Apple Satin Ribbon and Holiday Trio Cord.  Enjoy!

Friday, December 4, 2015

Stockings were hung.....

Today I have a card that reminds me of the story, "'Twas the night before Christmas....".  The stockings were hung from the chimney with care......
The base of the card was created with Whip Cream Cardstock and Rich Coral Cardstock.  I cut four strips of Winter Fresh paper and adhered them to the card making a weaved pattern.  I then popped up a snowflake from the Journey Blooms Holiday Die set, cut with Whip Cream Cardstock.
I stamped the stocking from the Christmas Melody stamp set, using Rich Coral Ink on Whip Cream cardstock and fussy cut the stocking.   I then adhered this to the card using a foam square.
I finished the card off by stamping the sentiment in Black Licorice ink from the Christmas Melody set and added a piece of Holiday Trio Cord and Tinsel Trim to the snowflake.  Enjoy!

Wednesday, December 2, 2015

December Calendar

It's December, the month of Christmas.  My favorite month of the whole year.  I love to decorate for Christmas, the smells of Christmas and the whole history behind Christmas.  Joy is a big word that comes to mind when I think about the season.   I had to include the word on my calendar.
The base of the photo side of the calendar was made from Candy Apple Cardstock.  I layered a piece of our Festive Paper on top (no longer available) and made a mat for my picture using Whip Cream cardstock.
I then die cut from Fresh Forest and Candy Apple Cardstocks, the elements from the Journey Blooms Holiday Set and Snapshot Frames Die sets.  I stamped the ornament border on the left side using the Ornament Party stamp set with Black Licorice Ink.
I tied some Black Licorice Journey Twine around the right side piece and then adhered the elements to the pieces with foam squares.
I finished the project off by adding Journey Glaze to the word Joy and Journey Glaze and Journey Sparkle Dust to some of the ornaments.  Enjoy the season!

Monday, November 30, 2015

Kiss me under the Mistletoe

Today, I have a simple card to share.
I took a piece of Candy Apple Cardstock and a piece of Journey Basics Brights paper and corner rounded the ends.  I adhered these two piece to the Whip Cream base.  I then die cut a Journey Circle from Whip Cream Cardstock.  I stamped the sentiments from the Mistletoe Kiss ATS onto the Journey Circle with Black Licorice ink.  I adhered this to the card with foam squares.
I stamped the mistletoe with Black Licorice Ink on Cranberry Bliss and Kiwi Slice Cardstock and fussy cut the pieces.  I then layered the berries on to the leaves and popped them up on the card.
I finished the card by adding some Journey Glaze to the berries.  Enjoy!

Saturday, November 28, 2015

O Christmas Tree

I love Christmas.  The day after Thanksgiving is the day to put up the Christmas Tree.
I created the base of the card with Candy Apple cardstock and then a piece of Winter Fresh paper for the background.  I then wrapped a piece of Candy Apple Satin Ribbon around the card.
I stamped the Christmas tree from the O Christmas ATS in Kiwi Slice Ink on Whip CreamCardstock.  I then placed another piece of Winter Fresh paper behind the Whip Cream Cardstock. 
To decorate the tree, I took a piece of Whip Cream Thread and tied it into a knot through the star button.  I added some Journey Sequins- Special Celebrations to the tree for the ornaments.  Enjoy!

Thursday, November 26, 2015

Happy Thanksgiving

Happy Thanksgiving to you and your family.  I have a special card to share with you today.
The base of the card is made from Oatmeal Cookie Cardstock.  I then cut a piece of the Neutrals Paper for the background.  I placed a piece of Oatmeal Cookie cardstock, cut with a banner end at the bottom, in the middle of the card.  I then wrapped a piece of Oatmeal Cookie Satin Ribbon around the card and tied Natural Journey Twine around that.  I tied the Journey Twine and added a Wooden Accent button to it and tied a bow.
I then die cut a Journey Ovals from Buttercream Cardstock.  Using the Give Thanks set, I stamped the Thanksgiving label in Hazelnut Blend Ink and stamped the Happy in Pumpkin Bread Ink.  I cut from the Snapshot Frames Die the leaf in Summer Days cardstock and used pop up foam squares to adhere the oval and the leaf to the card.
When I was done with assembly, I used Citrus Cooler Silk, to splatter the whole card.  Enjoy!

Tuesday, November 24, 2015

Pumpkin Thanks

Pumpkins are totally a fall thing. You see them first for Halloween and then you see them again for Thanksgiving.  Today, I wanted to create a card using a pumpkin, but I don't have a pumpkin stamp.  So, I got creative.
I used Tangerine Fusion Cardstock for the base of my card.  I then cut a piece of the pumpkin print from the Harvest Days Paper pack, to create the background of my card.  Using the Journey Rectangles, I cut a rectangle with the piercing element out of Buttercream Cardstock.  Before popping this up on the card, I tied a piece of Natural Journey Twine around the card.
To create the pumpkin I used the smallest doily from the Doily Blooms set and stamped three of them on Buttercream Cardstock with Tangerine Fusion ink.  I then fussy cut them out.  I dies cut the stem and leaf as one piece from the Flower Layers die set in Limeade Splash cardstock.
I then placed the two outside doilies on the rectangle, flat down.  I then popped up the middle doily up with a foam square.  I added some glue to the back of the leaf and tucked into the top of the pumpkin.
Using the Give Thanks set, I stamped the Thanksgiving in Cocoa Powder Ink and the Happy in Tangerine Fusion ink on Buttercream Cardstock.  I then matted the words on Tangerine Fusion cardstock and adhered it to the card.  Enjoy!

Sunday, November 22, 2015

Leafy Wreath

Today I have a card that I am in love with.  I love the fall season because of all the colors.
First, I cut a piece of the Journey Basics: Neutrals Paper Packto create the background on the Oatmeal Cookie base.  I die cut the doily from Designer Vellum Prints and wrapped a piece of Oatmeal Cookie Satin Ribbon around the whole card.
To make the leafy wreath, I die cut a circle from the Journey Circles from Buttercream Cardstock.  I then stamped the three leaves from the Give Thanks set in Cranberry Bliss, Summer Days and Tangerine Fusion ink around the outside of the circle.  Then using the Snapshot Frames, I die cut the two leaves using Candy Apple and Summer Days Cardstock.
To finish the card I stamped "Count your Blessings" from the Give Thanks set with Hazelnut Blend Ink and popped it up in the middle.  Enjoy!

Friday, November 20, 2015

Squirrel Love

I just love this squirrel stamp.  Today's card just screams Fall to me.
I used a piece of Oatmeal Cookie Cardstock for the base of my card.  I then used a piece of Hazelnut Blend Cardstock for the background.  I then cut two pieces 1 1/2 x 3 1/4 of Harvest Day paper and one piece of Buttercream Cardstock.  I then stamped the Share Life image with Hazelnut Blend Ink on the Buttercream Cardstock.  I then used Summer Days ink to distress this piece.
I adhered the two pieces of pattern paper to the card and popped up the piece of Buttercream Cardstock  I tied a piece of Natural Journey Twine around the card and on a Mini Clothespin.  I then attached the Mini Clothespin to the Buttercream Cardstock and added Journey Sequins- Special Celebrations to the card.  Enjoy!

Wednesday, November 18, 2015

Scrappy Quilt

Today, I have a card I made using scraps.
This card was a lot of fun to create.  I first cut a small rectangle of Hazelnut Blend Cardstock and placed it in the middle.  I then took 1/2 inch strips of the Harvest Day Paper and placed them in a pattern around the rectangle.  I then stamped the "Count your Blessings" from the Give Thanks set in Hazelnut Blend Ink and popped up on the rectangle in the middle.  That's it.  Simple, but very cozy.  Perfect for a Thanksgiving card.  Enjoy! 

Monday, November 16, 2015

Paper Pumpkin

Today's project is so cute and so easy.
This little pumpkin is made entirely of paper.  Here is how I did it.
First, I cut 10 strips of paper 3/4 x 4 from Harvest Days Paper.  I distressed the edges of the paper with Tangerine Fusion Ink.  I then punched holes in both ends of the strips.  Using a Journey Brad-Mini I attached the pieces of paper on one side.
I then fanned the pieces out and then stacked them on another brad.
I die cut from the Flower Layers Die set, the leaf from Limeade Splash Cardstock.
I cut strips of Limeade Splash Cardstock for the vines.  I then placed a Wooden Accent on top for the stem.  Enjoy!

Saturday, November 14, 2015

Grateful Heart

Today I have another card to get you in the Thanksgiving and gratitude mood.
This is a pretty simple card, but I really like the way it came out.
First I cut a piece of Buttercream Cardstock for the base of the card and a piece 3 x 1 3/4.  I positioned this small piece onto the card using a piece of scotch tape.
I then stamped the leaves from the Autumn Days set in Cranberry Bliss, Pumpkin Bread, Summer Days and Oatmeal Cookie Ink, overlapping and randomly on the card. 
I then took the small piece of Buttercream Cardstock off and adhered it to a piece of Dark Roast Cardstock measuring 3 1/4 x 1 7/8 to the back.  I then adhered the two layers to the card, matching the leaves up.
I finished the card by tying a piece of Natural Journey Twine around the card, tied into a knot.  Before tying the twine into a bow, I added a knotted piece of Oatmeal Cookie Satin Ribbon.  Enjoy!

Thursday, November 12, 2015

Cornucopia of Gratitude

Cornucopias have been a popular Fall and Thanksgiving decoration.  I remember having all church Thanksgiving dinners at my church when I was little and the cornucopias were the decoration in the middle of the table with a few mini pumpkins as well.
This card reminded me of this memory.
The base of the card is created using Tangerine Fusion Cardstock and a piece of Oatmeal Cookie Cardstock cut slightly smaller, popped up with foam squares.  On the piece of Oatmeal Cookie Cardstock I stamped the oak leaf stamp from the Autumn Days set with Oatmeal Cookie ink.
I then cut strips 1/2 by 4 3/4 out of the Harvest Days Prints and placed them on top of the Oatmeal Cookie background.  I then cut a Butter Cream cardstock rectangle from Journey Rectangles with the piercing element and distressed with Oatmeal Cookie Ink.  I stamped "With Gratitude" from the Cornucopia set in Dark Roast Ink.  I stamped the Cornucopia with Dark Roast Ink on a scrap piece of Butter Cream Cardstock.  I then colored the image with Copic Markers and fussy cut the image out.
I finished the card off by using foam squares to pop up the image on the rectangle.  Enjoy!


Tuesday, November 10, 2015

Give Thanks

Today's card gets me in the mood for November and Thanksgiving.
 The base of the card is made Hazelnut Blend, Buttercream and Oatmeal Cookie Cardstock.  Using Hazelnut Blend Ink I distressed the edges of the Buttercream and Oatmeal Cookie Cardstock.
Then, I stamped the background with Thread Sketch with Hazelnut Blend Ink.
I cut circles from Harvest Day paper with Journey Circles, in different sizes.  Using the piercing elements with the die cut, I cut one circle out of Buttercream Cardstock.
On the Buttercream circle, I stamped Give Thanks with Hazelnut Blend Ink and colored the "berries" with a light orange colored pencil.
I wrapped Natural Journey Twine around the card.  Then I created a fluffy bow out of the twine and tied it onto the card next to the Buttercream circle.  I added a piece of Natural Journey Twine to a Wooden Button and attached to the top of the bow.
I finished the card by splattered Gold Silk all over the card.  Enjoy!